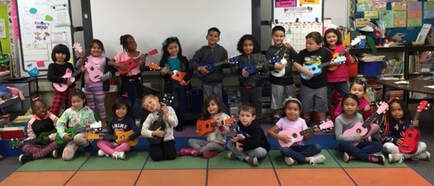
 Are you preparing your students to give a special informance (left) or performance (below)? The first one is often done in a relaxed atmosphere in your classroom by inviting visitors in. The second is more likely to occur in a more public space that may have a stage or a platform and a designated place for audience members to sit. The first is much easier, needing just in class rehearsal. The second is a much bigger proposition! No need to be daunted. Yes it's a big process but it also affords us as educators an enormous opportunity to teach things that just don't get addressed a different way. Facilitating and leading a great performance gives us opportunities to help students develop excellent listening skills, sequencing, mind body coordination, spatial relations, grace, mindfulness, a sense of timing, group awareness, courage, self confidence, communication skills, and then there are all the artistic abilities and skills they are developing, too. It's worth all the planning and practice when you take the time to use it as a chance to integrate music, drama, movement, and personal development. READY, SET, WAIT! In order to facilitate a positive and safe performing experience for students, we recommend taking 7 important steps to creating a successful show. These steps can increase the students' sense of being ready and in control and this will reduce their anxiety. Having a few jitters are normal but stage fright can be overwhelming. It fear or confusion leads a student to making a mistake and feeling embarrassed on stage, they may cry, shut down or run offstage! This can turn into a frozen moment during the show and a negative memory for that child which lasts and turns into low musical self esteem! Let's avoid that if we can! The steps that follow are designed to help you and your students to achieve safety making entrances and exits, smoothness of performance, and a beautiful result. 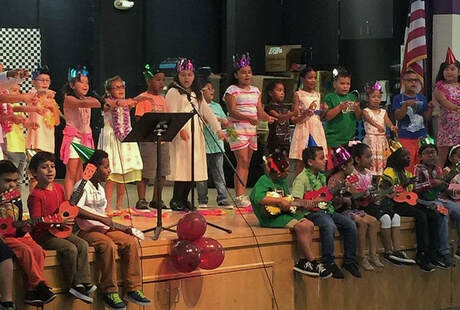 STEP ONE: DETERMINE LINE ORDER FOR SEATING, ENTRANCES AND EXITS Students need direction from you how to line up, who is singing and who will have a ukulele, and through what entrance to go on stage and off stage. DECIDE how this will go, then give clear instructions and practice lining up. STEP TWO: MAKE SURE EVERYONE CAN BE SEEN & HEARD Stage students so they can be seen and heard by the audience. This is easiest to do on paper first, then with the students themselves on stage, finding the right places without being watched by outsiders. You can explain that this step takes patience and paying attention. We recommend organizing your students in 2 or 3 rows:
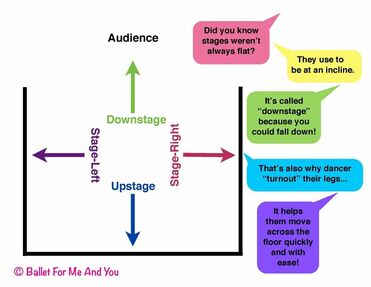 STEP THREE: SHARE YOUR PLAN AND TRY IT OUT FIRST! Before you bring students onstage, communicate with them about who will go where. Diagrams can help. Giving kids clear instructions first, answering questions in your classroom, then going to the stage to practice finding their places ahead of time is helpful for a smooth performance. This activity gives you a chance to teach locations on a stage! (Hint: Marking places with blue painters tape can guide their eyes and feet to the right spots.) 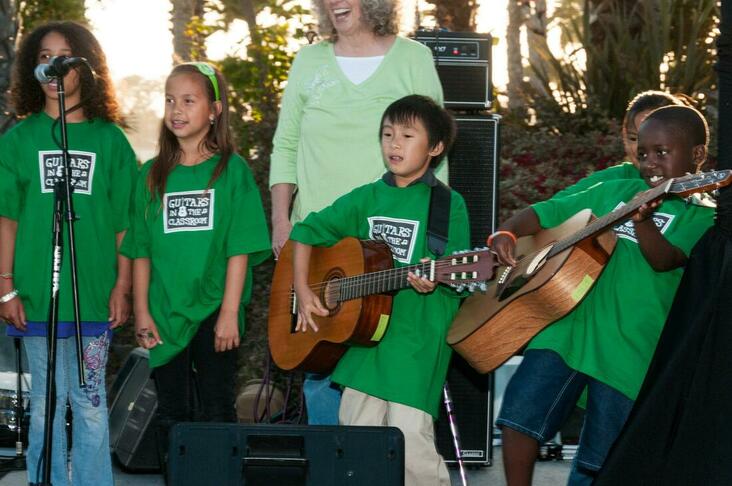 STAGE FOUR: MEMORIZE THE MATERIAL! Before performing, your students need to have their songs memorized. Singing with papers onstage leads to students holding the paper in front of their faces which means no one can see or hear them. After they finish, their parents may complain and make them feel bad about that. So it's best to start practicing singing and playing several weeks in advance until they can share their music without looking. Once they have their song committed to memory, you can help them practice singing and playing it from the stage while pretending to make eye contact with the audience. Children can find it helpful to choose a person to sing to or a spot on the back wall to look at while they sing in order to not appear distracted. Students smiling is great- but please don't shout "Smile! Smile!" during the performance. The audience can hear you! 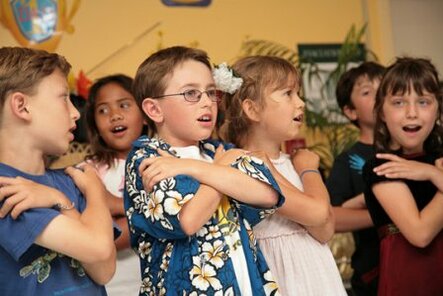 STEP FIVE: CHECK OUT THE SOUND SYSTEM & TEACH STUDENTS MIC TECHNIQUE AHEAD OF THE SHOW Our sound advice is this. If someone on staff or a friend can help you set up the sound and run it on the day of the performance, just say "Yes, please!" Two pairs of hands and ears are better than one. Why? School sound systems can be as simple as one podium and stationary mic, or far more elaborate. They can include good speakers or a bad one. They can be wired into the whole auditorium or consist of separate components. You won't know what you are working with until you physically explore this. Ask your facilities manager for a walk through and lesson a week before you plan to use the system. Then if anything doesn't work, you can adapt your plan. If the school system is lacking or sounds bad, it's not worth using. See if someone in the community can loan you equipment. Most bands have what you will need. Will your students be singing into a microphone or two, or more? If you are lucky, there are one or two suspended overhead that the kids don't even see. They can stand together, sing and be heard. But this is more common in high schools and junior highs than in elementary schools. If your school has a mic or two, you'll need to know what kind of mic it is. Is it uni-directional (for 1 voice only) or omni-directional (good for many voices)? This lets you teach children how to step up to the mic in the right position (a hand's width away). Safety First: Make sure they can see and avoid stepping on or over any microphone or speaker cables. Giving the students a chance to practice using the sound equipment without an audience is wonderfully helpful and their parents may even thank you for keeping them safe. Quality Over Volume: Singing loudly does not mean screaming. Please teach yours students to sing with their "beautiful singing voices" on stage and not to over-sing for volume. Kids who think they have to belt out a song to be heard will wind up screaming and singing out of tune. They just need to understand that the microphone will do the work of carrying their voices. Once they know their families can see and hear them, they can concentrate on the quality of their sound. 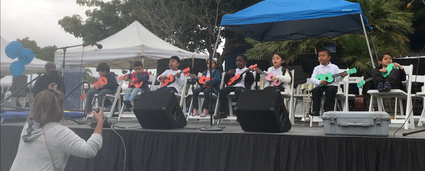 STEP SIX: BRAVELY LEAD THE MUSIC! You've got this! Or maybe you are not so sure about that... but either way, we encourage you to model creative courage and fake it til you make it. The kids need you. First of all, it's helpful to lead your students hands- free if you can. Your hands will be great for conducting the beat, signaling chord changes and so much more. Second, find a place to kneel or stand where the students can see your face. This may off to the side (in the wings) or best yet, down in front of the stage, facing the students where you can see every child and they can see you. From this visible position, you can bring students to attention before they sing. You can give them the first "initial" singing pitch of their song to sing together before they begin! You can also hold large lyric signs if needed, signal hand motions, or move your arms to help them keep the beat. Third, smile smile smile. They need to see your encouraging face. Fourth, rehearse the songs in performance order to work on transitions. If something isn't sounding right, it is fine to stop, fix what doesn't go well and start again. This is your best opportunity to teach kids that mistakes are stepping stones, not stumbling blocks. You can polish the music together. (Thank you to GITC faculty trainer and board member, Joan Maute for sharing that phrase with GITC!) From their position on stage, at the end of the last song, the children can learn to take a bow and practice timing that bow together. This makes for a very impressive finish! During rehearsal, practice bows and watch their anticipation and pride blossom. 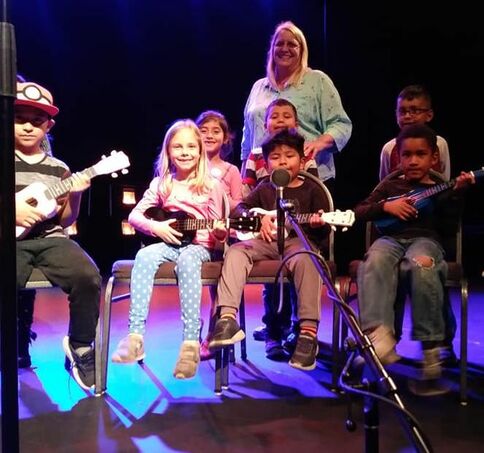 STEP SEVEN: MAKE A GRACEFUL EXIT Last but not least comes leaving the stage in the proper order, carefully, no one tripping. If you have rows, it can look good to leave the stage, back row first. Kids in the front can keep looking adorable while the back row clears out, then they will follow you. But if crowding prohibits that, do what works! But where are they going? In what direction and where to? Who are your line leaders? How will they know when and where to go? Will an adult be ready at the base of the stairs to give students a hand stepping down? This can be a wonderful job for a parent. If you appoint and educate your line leaders, teach kids where to go, what to do once there, and practice their song cues, you can expect and excellent performance. Then some practice leaving the stage and transitioning back to their designated seats - or out the door - assures a graceful exit. This may require a few tries to get it right but the safety and confidence that this practice can impart to the children will really pay off in the end and set good habits for future performances. And what happens after show is over? Flowers? Food? A party? Don't be afraid to dream big. Your students and family members might love a celebration of some kind and you will definitely deserve one! TEACHING STUDENTS POSITIVE CRITIQUE SKILLS When you get back to class, you may want to give the students a chance to process what happened and how they feel about that. Keeping everything positive is critical for young children. Setting ground rules first will help. "No put downs" is important. Practicing compassion is beautiful. If someone made a mistake or had trouble, the group can learn how to listen, understand and give support. You might ask students to share what did they feel they did well as a group - and why? What worked? Ask what they think might have been better if only? What could they try doing differently next time to get a better outcome? Acknowledge personal gains. Who achieved a personal goal? By leading a positive discussion in which students practice giving and receiving compliments, this will deepen their learning from the performance experience and build their self awareness and self esteem. The Arts always give us beautiful and unique ways to grow. We hope that putting the time into considering this preparation process has been helpful. Our hope is that you as a leader will also gain a true sense of accomplishment and pride in yourself and in your students. Their success is your success and yours is theirs. We'd love to hear about your performance and see photos and video if you want to share! And feel free to comment, add tips, etc. You can also send anything you want to tell us about to [email protected]. Thanks for reading.
2 Comments
Patti Steele
4/23/2019 06:05:45 pm
Thank you, Jess! Great advice and a huge heads up!!! Words of wisdom that we all need! Patti
Reply
8/8/2022 08:16:26 am
Reply
Leave a Reply. |
BlogArchives
June 2024
Categories
All
|
Copyright © 2024 Guitars In The Classroom. All rights reserved.

 RSS Feed